Working with stone may seem intimidating at first, but laser engraving has made it accessible to hobbyists and small business owners alike. The process doesn’t just create a lasting impression on granite, marble, or slate – it lets you turn raw, heavy pieces into sleek, personalized works of art. Whether your goal is to craft custom coasters, a memorial plaque, or unique jewelry, engraving stone is more approachable than most beginners realize.
Before you grab a machine and dive in, let’s walk through the essentials, clear up common fears, and give you a reliable roadmap.
Why Stone Is a Great Medium for Beginners
Stone has natural durability that makes engraved designs stand out. Once etched, the marks resist fading, scratching, and weather exposure. That’s why engraved headstones last centuries while a printed label fades in months. For beginners, it’s reassuring to know that mistakes are rare once you dial in the right settings – stone tends to cooperate if you prepare it properly.
Key benefits include:
- Longevity: Your design won’t peel or wear away.
- Contrast: Polished or dark stones reveal sharp white or gray engravings.
- Versatility: Works on granite, marble, river rocks, and even slate tiles.
If you’re considering projects to sell or gift, stone instantly elevates the value of your work.
Choosing the Right Tools and Machines
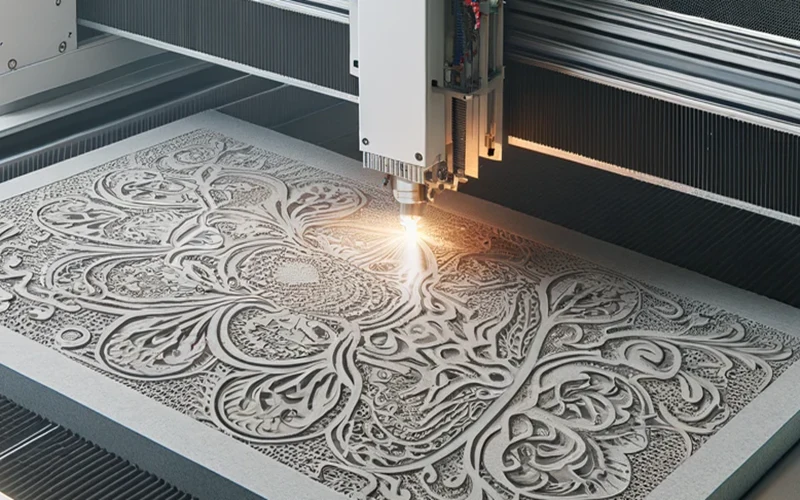
Here’s where some beginners stumble: not every machine handles stone well. CO₂ lasers are commonly used, but they work by fracturing the stone surface rather than cutting. That means you’ll get a frosty, contrasting effect instead of a deep carve. Fiber lasers can also be used for certain dense stones, though they’re typically pricier.
For most hobbyists, a desktop CO₂ laser is enough. Always check the machine’s wattage – 40W can handle small stones, but 60W+ is recommended for larger, polished surfaces.
This is also a good moment to get acquainted with reliable platforms that provide guidance and machines. For example, laser engraving resources like TOOCAA can walk you through specifications, compatible materials, and step-by-step tutorials, so you don’t waste money on a setup that can’t handle your projects.
Preparing Your Stone Surface
Think of preparation as half the job. A well-prepped surface ensures the engraving looks crisp rather than patchy.
- Clean thoroughly – Wash the stone with mild soap and water, removing dust, oil, or residue. Any speck can disrupt the laser path.
- Dry completely – Moisture interferes with laser heat, leading to uneven marks.
- Mask if needed – Use painter’s tape or a laser mask film if you want to protect unengraved areas from residue.
- Position securely – Stones shift easily; place them on a flat, stable base or use clamps if your machine allows.
This stage might feel boring, but skipping it is the fastest way to ruin a project.

Creating Your Design and Software Setup
Most lasers come with software like LightBurn or proprietary programs. Even if you’ve never worked with design tools, you can start with simple text or imported images. Here’s what matters:
- Vector graphics (like .svg files) are cleaner than raster images.
- High contrast images translate best onto stone.
- Size scaling is critical – measure the stone and frame your design accordingly.
Tip: Beginners often try to engrave highly detailed photos right away. Start simpler, with bold text or silhouettes, and gradually build confidence.
Testing Power and Speed Settings
Stone isn’t uniform. A granite tile reacts differently from a river rock. That’s why testing is essential.
Set aside a scrap piece of similar stone and create a small test grid in your software. Vary the power and speed settings in each square. After engraving, compare results and choose the combination that produces the sharpest, most consistent contrast.
General starting points:
- Power: 30–60% for CO₂ lasers.
- Speed: 200–400 mm/s.
- DPI (dots per inch): 250–500 is usually enough – higher may not improve quality.
Testing saves you frustration and teaches you how different stones react.
Engraving the Stone Step by Step
Now for the main event. Once your prep and tests are done, the actual engraving is surprisingly straightforward:
- Place the stone in your machine, aligned with the laser bed grid.
- Focus the laser according to your machine’s manual (critical for clarity).
- Double-check the design positioning with a “frame” preview, if your software supports it.
- Start the job and let the machine run uninterrupted. Avoid lifting the lid or moving the stone.
- When finished, let the stone cool before touching – it may hold heat.
Watching the laser trace your design is the most satisfying moment. You’ll notice the frosty white marks forming in real time.

Post-Engraving Cleanup and Finishing Touches
When the laser stops, you’ll often see powdery residue sitting on the stone. Don’t panic – it’s normal.
- Wipe the surface with a damp cloth or a soft brush.
- For polished stones, a quick spray of glass cleaner restores shine.
- Optional: Apply stone sealant to protect outdoor projects.
Some engravers even add acrylic paint or gold leaf into engraved grooves for extra flair. As a beginner, though, a clean engraved finish is usually impressive enough on its own.
Common Mistakes Beginners Should Avoid
Mistakes happen, but most are preventable. Here are the biggest ones I’ve seen:
- Skipping tests – Every stone reacts differently; guessing leads to weak or burnt engravings.
- Overpowering – Too much laser power causes fractures or chipping instead of smooth etching.
- Wrong focus – A blurry laser beam means blurry results.
- Crowded designs – Small fonts or complex graphics often get lost on rough surfaces.
Remember, engraving is as much about patience as it is about creativity.
Creative Project Ideas to Try
Once you’ve mastered the basics, try your hand at projects that make the effort worthwhile:
- Personalized granite coasters for weddings.
- Slate kitchen signs with rustic quotes.
- Commemorative plaques for pets or memorials.
- Garden markers with plant names.
- Customized jewelry using small polished stones.
These ideas also make great starting points for small business ventures. Stone products carry a perception of quality that lets you price them higher than wood or acrylic equivalents.
Safety Tips That Shouldn’t Be Ignored
Engraving might feel safe compared to cutting wood, but lasers and stone dust come with risks:
- Always wear protective eyewear rated for your laser type.
- Keep the room ventilated – stone dust is fine and not good for your lungs.
- Never leave the machine unattended.
- Keep water or a fire extinguisher nearby, even though fire risk is lower with stone.
Safe habits from the beginning save you headaches later.
Final Thoughts
Laser engraving stone isn’t reserved for experts with industrial machines. With the right preparation, settings, and care, beginners can create professional-looking projects that last a lifetime. The process blends technical precision with artistic creativity, and every piece you engrave teaches you something new.
So start small, test often, and let your imagination play across the surface of stone. Before long, you’ll have a collection of durable, meaningful creations – and maybe even a side business – etched with your personal touch.