Starting an indoor herb garden from seeds is a rewarding and convenient way to enjoy fresh herbs year-round. Whether you’re a seasoned gardener or just getting started, this guide will walk you through the process of growing your favorite herbs indoors.
Companion planting involves growing certain plants together to enhance growth and deter pests. For an indoor herb garden, consider pairing herbs that thrive in similar conditions. For example, basil and oregano both enjoy bright light and similar watering schedules. Visit Organo Republic to buy online seeds.
Companion planting can also enhance the flavors of your herbs and help manage pests naturally. Do some research on which herbs grow well together to optimize your indoor garden setup.
Benefits of an Indoor Herb Garden

- Freshness: enjoy the freshest herbs, picked straight from your garden.
- Convenience: have culinary and medicinal herbs at your fingertips.
- Cost-Effective: growing from seeds is often cheaper than buying plants or fresh herbs regularly.
- Aesthetics: an indoor garden can add greenery and a pleasant aroma to your living space.
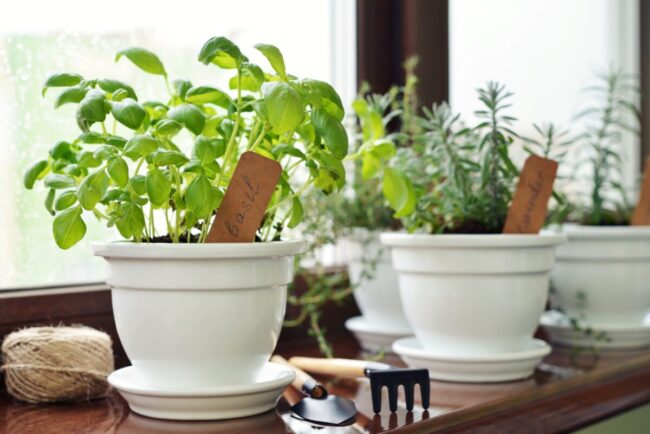
Choosing Your Herbs
Select herbs that thrive indoors and suit your culinary preferences. Some popular choices include:
- Basil;
- Parsley;
- Cilantro;
- Mint;
- Thyme;
- Oregano;
- Rosemary;
- Chives.
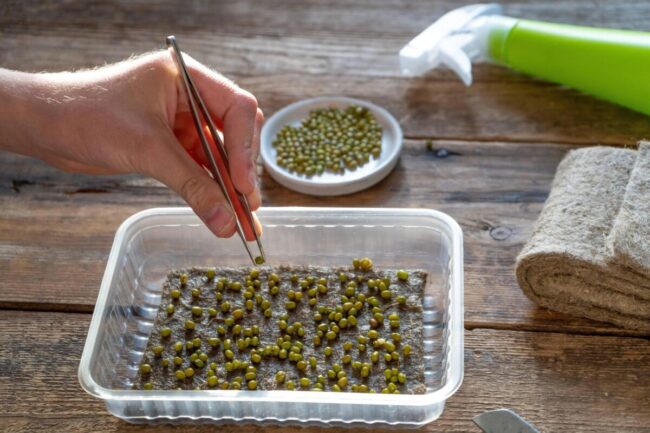
Gathering Supplies
You’ll need the following supplies to get started:
- Quality seeds;
- Seed-starting mix or potting soil;
- Seed trays or small pots;
- Labels;
- Spray bottle for watering;
- Grow lights (if natural light is insufficient);
- Small trowel or spoon for transplanting.
- Grow tents ((If you want a controlled environment for growing plants)
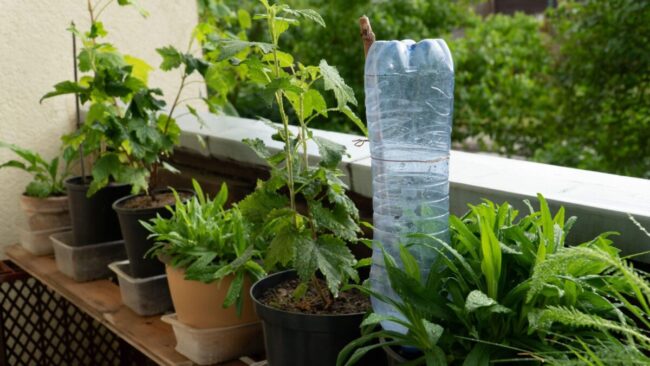
Setting Up Your Indoor Garden
Find a spot in your home that receives plenty of natural light. Most herbs need at least 6 hours of sunlight per day. If natural light is limited, consider using grow lights to provide the necessary light spectrum for healthy growth.
Preparing the Soil
Use a well-draining seed-starting mix or potting soil. Herbs generally prefer soil that is light and airy. Fill your seed trays or pots with the soil mix, leaving about half an inch from the top.
Sowing the Seeds
- Moisten the Soil: Lightly water the soil until it is evenly moist but not soggy.
- Plant the Seeds: Sow the seeds according to the depth specified on the seed packet. As a general rule, plant small seeds shallowly and larger seeds deeper.
- Cover and Label: Lightly cover the seeds with soil and label each tray or pot with the herb name and planting date.
Germinating the Seeds
Place your seed trays in a warm location. Most herb seeds germinate best at temperatures between 60-70°F (15–21°C).
- Watering: Keep the soil consistently moist using a spray bottle. Avoid overwatering, which can lead to mold and damping-off disease.
- Humidity: Cover the trays with a plastic dome or plastic wrap to maintain humidity. Remove the cover once the seeds have germinated.
Light
Ensure your seedlings receive ample light. Place them in a sunny window or under grow lights for 12–16 hours a day to prevent them from becoming leggy.
Watering
Water the seedlings when the top inch of soil feels dry. Use a watering can with a fine spout or a spray bottle to avoid disturbing the young plants.
Feeding
Once seedlings have developed their first set of true leaves, feed them with a half-strength liquid fertilizer every two weeks to promote healthy growth.
Transplanting Seedlings
When your seedlings have two sets of true leaves, they are ready to be transplanted into larger pots.
- Prepare the Pots: choose pots that are at least 4–6 inches in diameter with drainage holes.
- Transplant: gently remove the seedlings from their trays, being careful not to damage the roots. Plant them in the prepared pots, filling in with additional soil as needed. Water thoroughly.
Pruning and Harvesting
Regularly pinch back the tips of your herbs to encourage bushy growth and prevent flowering. Harvest leaves as needed, taking care not to remove more than one-third of the plant at a time.
Pest Control
Keep an eye out for common indoor pests such as aphids and spider mites. If infestations occur, treat the plants with insecticidal soap or neem oil.
Creating a Watering Schedule
Creating a regular watering schedule is key to the success of your indoor herb garden. Herbs require consistent moisture but not soggy conditions. Check the soil’s moisture level regularly by inserting your finger about an inch into the soil.
If it feels dry, it’s time to water. Use a watering can with a fine spout or a spray bottle to gently water your herbs, avoiding over-saturation which can cause root rot.
Managing Indoor Humidity
Indoor humidity levels can greatly affect herb growth. Many herbs thrive in humid conditions, so maintaining the right level of humidity is essential. You can increase humidity by placing a shallow tray of water near your herb pots or using a humidifier.
Grouping plants together can also help maintain a higher humidity level around your herbs. During dry winter months, these methods are particularly helpful in preventing the plants from drying out.
Maintaining Air Circulation
Proper air circulation is vital for preventing mold and mildew in your indoor herb garden. Place your pots in a well-ventilated area, and consider using a small fan to keep the air moving.
Good air circulation helps reduce the risk of fungal diseases and promotes healthier plant growth. Rotate your plants regularly to ensure they receive even air exposure and prevent any single side from becoming too damp.
Rotation
Rotate your pots occasionally to ensure even light exposure and prevent your herbs from leaning toward the light source.
By following these steps, you’ll be well on your way to cultivating a thriving indoor herb garden from seeds. Enjoy the convenience and satisfaction of having fresh herbs at your fingertips, ready to enhance your culinary creations and boost your well-being.